Soil Preparation for Raspberry Plants
Preparing your soil before you plant will greatly improve your raspberry plant’s performance and promote healthy, vigorous growth. We recommend that you have your soil tested prior to planting, and even annually after planting, to determine if there are any deficiencies in necessary nutrients. This will help you determine if you should fertilize to supplement nutrients that may be lacking. You can use one of our digital soil meters to test your soil, including its pH and moisture levels, or collect a soil sample to send to your local cooperative horticultural extension who will be able to run a more comprehensive soil test.
The goal of soil preparation is to give new raspberry plants a strong foundation for their future growth and development. This may include replenishing vital minerals and nutrients with fertilizers or organic matter, and breaking up and loosening currently compacted soils.
NOTE: This is part 5 in a series of 11 articles. For a complete background on how to grow raspberry plants, we recommend starting from the beginning.
Common Soil Types
- Clay and silt soils are made of very small particles. They feel slick and sticky when wet. Clay and silt hold moisture well, but resist water infiltration, especially when they are dry. Puddles often form on clay or silt soils, and these soils easily become compacted.
- Loam soils are loose and look rich. When squeezed in your fist, moist loam will form a ball, which crumbles when poked with a finger. Loam soils normally absorb water and store moisture well. Loam soils can be sandy or clay based, but are a mix of sand, silt or clay, and organic matter. They will vary in moisture absorption and retention.
- Sandy soils contain large particles that are visible to the unaided eye, and are usually light in color. Sand feels coarse when wet or dry, and will not form a ball when squeezed in your fist regardless of water content. Sandy soils stay loose and allow moisture to penetrate easily, but will not retain water long-term.
When to Prepare Your Soil
Soil preparation can be done at any time of year that the ground is not overly saturated with water or frozen. It is most ideal to prepare the soil prior to planting, but, if you need to address any issues even after your raspberry plants are in the ground, it is possible.
Common soil amendments for raspberry plants:
- compost
- sand
- manure
- garden lime (if native soil pH is too low/acid)
- baled sphagnum/granular peat moss (if native soil pH is too high/alkaline)
Your lawn can provide you with ideal organic materials such as grass clippings and shredded leaves. Not only will the grass and leaves break down to provide soil nutrients naturally, but they will help loosen the soil as well. You can gather these in the fall with spring planting in mind.
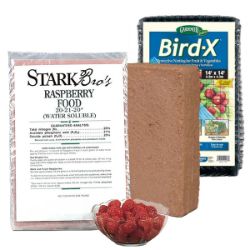
Adding organic matter, such as our Coco-Fiber Growing Medium and compost will improve the composition of most every soil type. Organic materials bind sandy soil particles so they retain moisture and nutrients better. They also break apart clay and silt particles, so that water can soak in and roots can spread.
How to Prepare Your Soil
- Prior to planting, dig a hole or trench deep and wide enough so the the future raspberry plants’ root systems have plenty of room to easily expand. Keep the nutritious topsoil in a separate pile so you can put it in the bottom of the hole, where it’ll do the most good.
- Loosen the topsoil and mix in any soil amendments (dehydrated cow manure, garden compost, etc.) into your pile of topsoil. You can also add a few inches of organic matter like compost and work in evenly with the existing soil.
- Use your mixture to backfill the raspberry plants’ roots in their prepared planting holes at planting time.


