Planting Cherry Trees
Successfully establishing a young cherry tree starts with your planting site and planting method. Once a cherry tree is well established, it needs little assistance to grow and bear fruit.
NOTE: This is part 4 in a series of 11 articles. For a complete background on how to grow cherry trees, we recommend starting from the beginning.
Cherry trees require fertile, balanced soil for good growth, so before you plant, test the soil where your trees will live – including the soil pH. Refer to the section on Soil Preparation for tips on testing your soil.
Sweet and sour cherries have similar needs, but sweet cherries are fussier about drainage and pH, which should range between 6.3 and 7.2. Sour cherries are more adaptable to a wider range of soils, and prefer a pH of 6.0 to 7.0.
Take a look at the established trees and plants around the site. Do they look healthy? Are they growing well? This will help give you an idea of the success you can expect with new plantings in the same area. Remember to steer clear of heavy clay soil or any soil that is poorly drained, especially if you’re planting sweet cherry trees.
Cherry trees may be planted even when temperatures are quite cool, especially if they arrive bare-root and dormant. If a hard frost is expected, it is advisable to delay planting for a while until temperatures become more moderate. Do not expose roots to temperatures that are freezing or below. Generally, as long as your soil is workable, it is fine to plant.
Steps to Planting Cherry Trees
Planting Bare-root Cherry Trees
- Before planting: soak the cherry tree’s roots in a bucket or large tub of water for 1 to 2 hours. This keep the roots from drying out while you dig the planting hole. Avoid soaking roots for more than 6 hours. Remember: do not expose roots to freezing temperatures (or below) prior to planting.

- Dig the planting hole deep and wide enough so the root system has plenty of room to easily spread and grow. Keep the more nutritious topsoil in a separate pile so you can put it in the bottom of the hole, where it will do the most good.
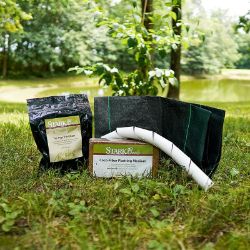
- To loosen the soil, mix aged/rotted manure, garden compost, coir or peat moss (up to 1/3 concentration) into your pile of topsoil. The peat moss should either be baled sphagnum or granular peat. Note: Peat is acidic (has a low pH), so if you use this rather than neutral coir, it may affect the soil pH around the roots. Coir, like our Coco-Fiber Planting Medium, can be added instead of peat – or just work in 2 inches or more of organic material with the existing soil.
- Place the cherry tree in the center of the planting hole with its roots down and spread out. Holding onto the trunk to keep it vertical, backfill the hole, putting the topsoil back in first. Important: keep the graft union (the noticeable “bump” in the lower trunk) 2-3 inches above the ground for dwarf and semi-dwarf types. Read more about Planting Budded and Grafted Cherry Trees below.
- Fill in the soil carefully around the roots, tamping it down firmly as you refill the planting hole. This will eliminate air pockets that could damage the roots.
- Especially if you’re planting on a slope, create a rim of soil around the planting hole about 2 inches above ground level. This is called a “berm” and it works to catch water so that it can soak in, rather than run off and cause soil erosion. Spread the soil evenly around tree.
- Read more about Digging a Planting Hole and Planting Bare-Root Fruit Trees.
Planting Potted Cherry Trees
Cherry trees that are grown and shipped in our Stark® EZ Start® 4"x4x"10" bottomless pots are a result of our continuing quest for providing you with the best trees with a robust root system. By following these simple instructions, you’ll be assured of getting your new potted cherry tree off to the best possible start.
- Before planting: When your cherry tree arrives, carefully take it out of the package. Your potted tree has been watered prior to shipment and should arrive with damp soil around the roots; however, it does need another drink when it arrives at your home. Be sure the water reaches all of the roots, all the way to the bottom of the container. If you can’t plant your tree immediately, keep the roots hydrated and keep the tree in a sheltered location until you’re able to plant. Do not place your potted cherry tree in a bucket of water. This could cause the roots to rot and weaken, or even kill the tree.
- Your potted cherry tree is ready for planting as soon as it arrives. To remove the tree from its temporary container, simply grasp the sides of the pot and carefully slide the tree out. If the tree’s roots do not easily slide out of the container, you may need to gently pry the inside edges of the container away from the root system, and loosen it until the roots slide freely from the pot.
Note: do not plant the plastic Stark® EZ Start® bottomless pot in the ground. It is not intended to break down over time as your cherry tree grows, and it will cause root restriction, injury and may even be fatal to the tree. The pot your tree arrives in is only intended to be a temporary container.
- While some potting soil might shake loose, most of it should remain around the cherry tree’s roots. Gently separate, untangle, and spread out the tree’s roots and place it, soil and all, into the prepared planting hole. Backfill the hole with topsoil, same as you would a bare-root cherry tree (see above). Water thoroughly.
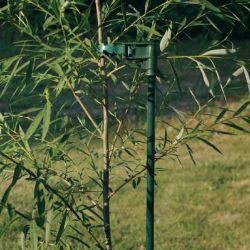
- Your potted cherry tree may have come with a bamboo stake, which helped straighten the tree as it grew in its pot. We recommend that you keep the tree staked when you plant to help keep it growing straight. You may remove the bamboo stake and replace it with a different tree stake, if you prefer.
Post-Planting
Thoroughly water your newly planted cherry tree. A deep soaking with about a gallon of water is perfect. If a soil test determines that fertilizer is needed, then it is recommended that you wait a few weeks after planting to fertilize new cherry trees to protect their sensitive roots. If planting in the fall, wait until spring instead to apply fertilizer.

Mulch
Apply 2-3 inches of organic material like wood bark (rather than an inorganic material, like rocks) around the root zone of your cherry tree. Mulching helps discourage weeds and prevent evaporation, water pooling and freeze injury around the trunk going into winter. In the fall, double the mulch layer or add a layer of straw for winter protection.
Note: Rodents and other small gnawing critters could take advantage of mulch that is applied too thickly. They may chew the tree’s bark as a snack – a type of injury that can be fatal, especially to new cherry trees.
One final point: Please be sure to remove the nametag from your cherry tree. As the tree grows, this small piece of plastic can choke off its circulation, causing damage like girdling and even tree death. If you’d like to keep the tag on your tree, retie it loosely with soft twine and be sure to keep it from becoming restricted as the tree grows.

