Planting Nectarine Trees
Successfully establishing a young fruit tree in your yard starts with your planting site and method. Once a fruit tree is established, it needs little assistance to grow and bear fruit; but you’ll want to make sure you give your trees the right foundation.
NOTE: This is part 4 in a series of 11 articles. For a complete background on how to grow nectarine trees, we recommend starting from the beginning.
Fruit trees require fertile soil for good growth, so before you plant, check your soil pH. Contact your local County Extension Office for information about soil testing in your area, or purchase one of our digital meters for quick and accurate results. If the soil pH where you plant your tree is 6.0-7.0, you’re in good shape. Take a look at the established trees and plants around the site. If they look healthy and are growing well, just follow the recommended fertilization program for your fruit trees. Steer clear of soils that are extremely heavy or poorly drained.
Planting Steps
- Before planting: soak tree roots in a tub or large trash can of water for one to two hours to keep its roots from drying while you dig. Do not soak more than six hours. DO NOT expose roots to freezing temperatures while planting.
- Dig the hole deep and wide enough so the root system has plenty of room. (Keep the topsoil in a separate pile so you can put it in the bottom of the hole, where it’ll do the most good.)
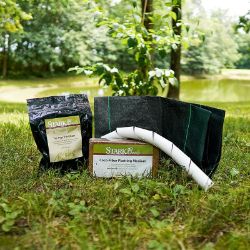
- Roots grow better in soil that’s been loosened, so mix in our Coco-Fiber Potting Medium into your pile of topsoil. You can also use dehydrated cow mature, garden compost or peat moss (up to 1/3 concentration).
- Fill the hole, putting the topsoil back in first. You can avoid creating air pockets by working the soil carefully around the roots and tamping down firmly.
- Create a rim of soil around the planting hole 2” above ground level. This allows water to stand and soak in. (In the fall, spread soil evenly around tree to prevent damage from water freezing around the plant.)
Post-Planting
- Water your new tree. Deep, thorough soaking is best, with a solution of Stark® Tre-Pep® Fertilizer. (If planting in the fall, wait to fertilize until spring for best results.) This effective starter fertilizer helps trees and plants grow quickly and vigorously. After watering, if soil compacts, be sure to add enough soil to fill the hole to ground level.
Grafted Trees
Grafted trees need special planting attention. All Stark Bro’s fruit trees are grafted or budded, the only methods for growing true-to-name planting stock. You can see where the fruiting variety on top is joined to the root variety on the bottom by a bump in the bark, change in the bark color or a slight offset angle. For certain dwarf trees, it’s very important to keep this graft above the ground. Otherwise, roots could develop from above the graft; then your tree could grow to full size by bypassing its dwarfing parts.
Most Stark fruit trees are budded to specially selected clonal rootstocks. For dwarf, semi-dwarf and colonnade apple trees, the bud union should be planted 2-3” above the soil line. Standard size apple trees as well as our Custom Grafted trees should be planted 1-2” deeper than the soil lines from the nursery row.
For dwarf pears, peaches, nectarines, apricots, cherries and plums trees the bud-graft line should remain at or above the ground and for standard size trees they will do better with a slightly deeper planting.
Potted Trees
Stark trees that are grown and shipped in bottomless pots are part of our continuing quest for producing better and stronger trees for the home grower. By following these simple instructions, you will be assured of getting your young tree off to the best possible start.
- Before planting: When your tree arrives, carefully take it out of the package, making sure not to damage any of the branches. The potted tree has been watered prior to shipment and should arrive moist, but it does need another drink when it arrives at your home. Be sure the container is moist clear through. If you can’t plant your tree immediately upon arrival, keep the pot moist until you can plant it and keep the tree in a sheltered location. DO NOT place your potted tree in a bucket of water. This could cause the roots to rot, and kill your tree.
- Your tree is ready for planting as soon as it arrives at your home. Then, simply grasp the sides of the container and carefully slide the tree out. The potting soil should remain intact around the tree’s roots. You will want to keep this soil with the tree and plant it, soil and all, into the prepared hole.
- Fill the hole with soil and water thoroughly with a solution of Stark® Tre-Pep® Fertilizer.
- Your potted tree may have come with a bamboo stake, which helped straighten the baby tree as it grew in the pot. We recommend that you keep the tree staked when you plant the tree, as we recommend staking for all young trees of any type. You may remove the stake and replace it with a different style if you prefer. Tree Stake, the perfect strapping system for Stark Bro’s trees, comes with a sturdy fiberglass rod, and a revolutionary flexible strapping system that allows for movement and growth, available from Stark Bro’s.
One final point: Please be sure to remove the name tag from your tree. As the tree grows, this small piece of plastic can choke off its circulation, damaging or killing the tree. If you’d like to keep the tag on your tree, retie it loosely with soft twine.


